Getting Started
osmFISH is an easy protocol to perform and we had many people that successfully adapted our protocol. However, to perform multiple rounds there are some technical considerations regarding the setup and imaging. We try to make the osmFISH protocol as easy to adapt as possible. Below you will find a detailed protocol and our advise for the flow cell and imaging setup. Please get into contact if anything is unclear.
Protocol
You can find a detailed step-by-step protocol on Protocols.io or download here
Flow Cell

Using a flow cell has a couple of advantages. The main one is that our flow cell has the format of a microtiter plate, so that it can reliably be placed in the microscope stage adapter with minimal displacement between rounds. This ensures that we image almost the exact same region of interest in each round of the experiment. Furthermore, having a flow cell enables the connection to an automated fluidic system. This eliminates human error and prevents the introduction of contaminants like dust.
The 6 chamber flow cell that we use has been developed together with microliquid. This is the 3D model of the base and the lids, but if you want to use the chambers we strongly advise to contact Microliquid to have them make a reproduction.
With this design, the volume of the hybridization chamber is approximately 1ml. This is more than is required, and therefore, we designed inserts that are placed in the chamber to restrict the volume and direct the flow better (greenish in the above image). These are casted from Polydimethylsiloxane (PDMS) using this 3D printed mold. Make sure that the mold is not overfilled and the inserts become too thick. This will crack the glass after tightening the chamber. It is probably simpler to ask Microliquid to design a lid with a lower volume.
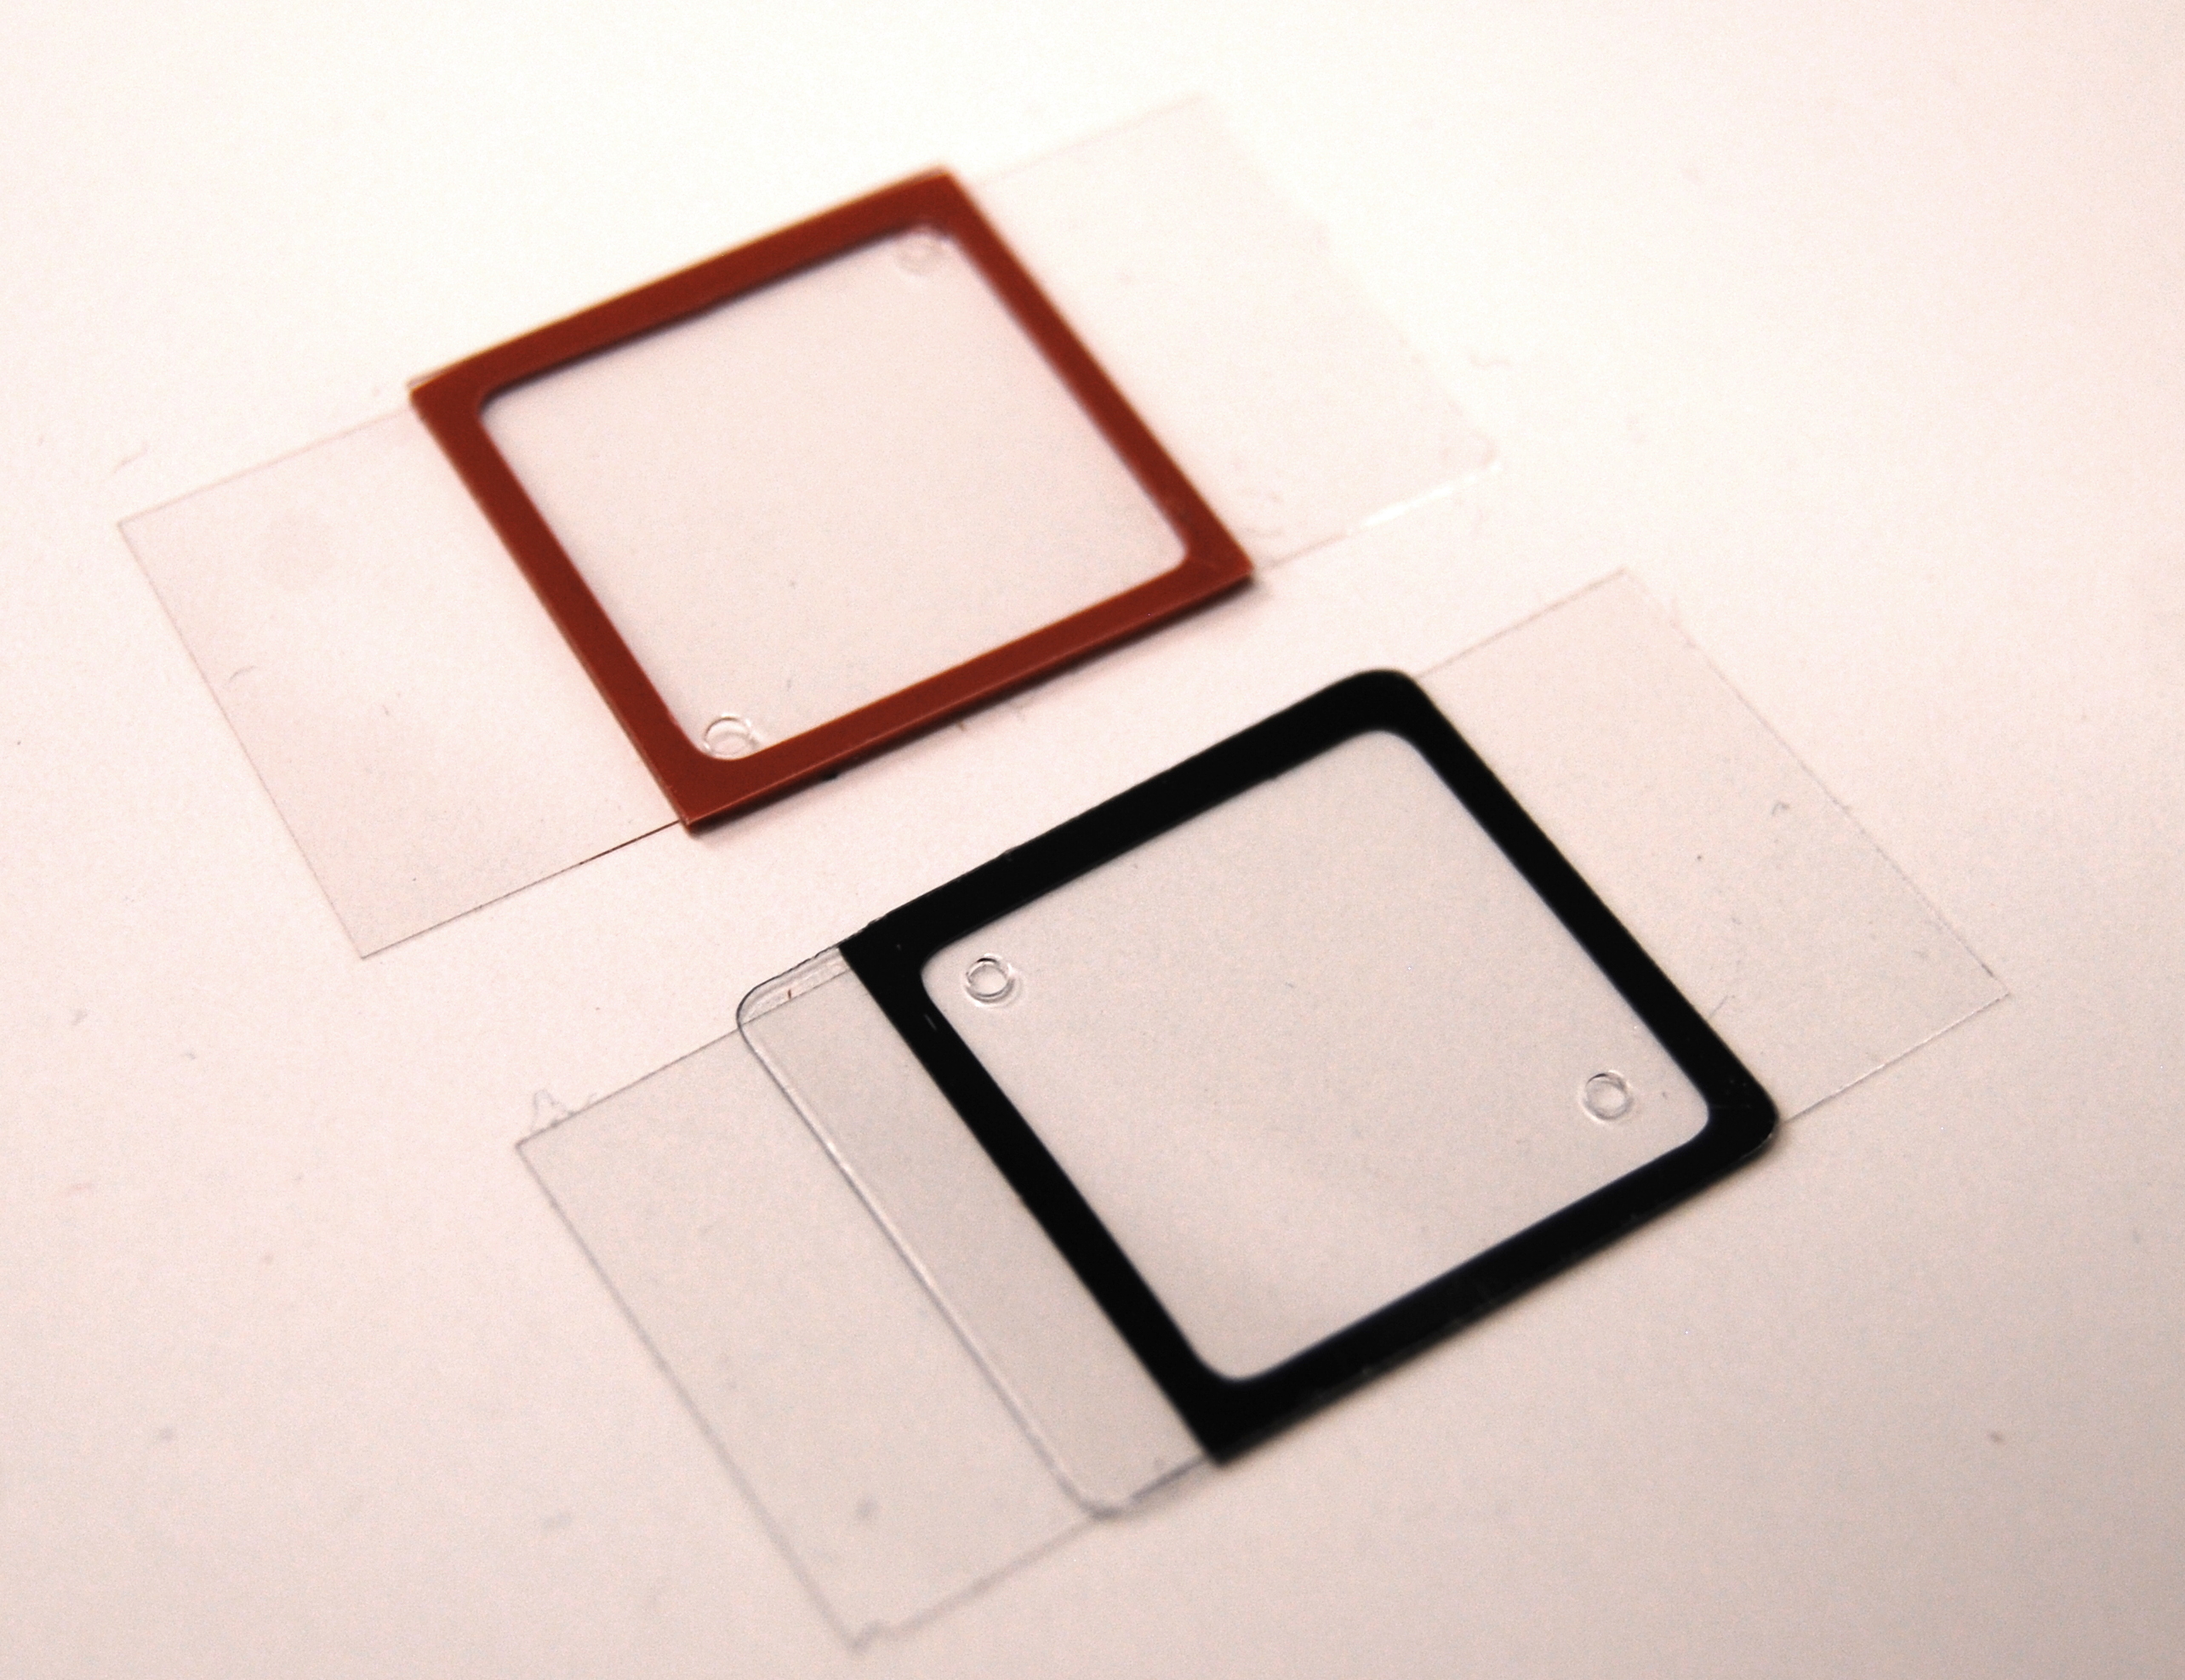
As simple flow cell alternative, we have been using Grace Bio-labs hybridization chambers. This are stickers that can be placed on top of the glass with the sample to form a flow cell. The models we used are the black HybriWell and the orange Secure Seal. The black ones have a smaller vollume but are harder to remove from the glass than the orange chambers.
Fluidic system
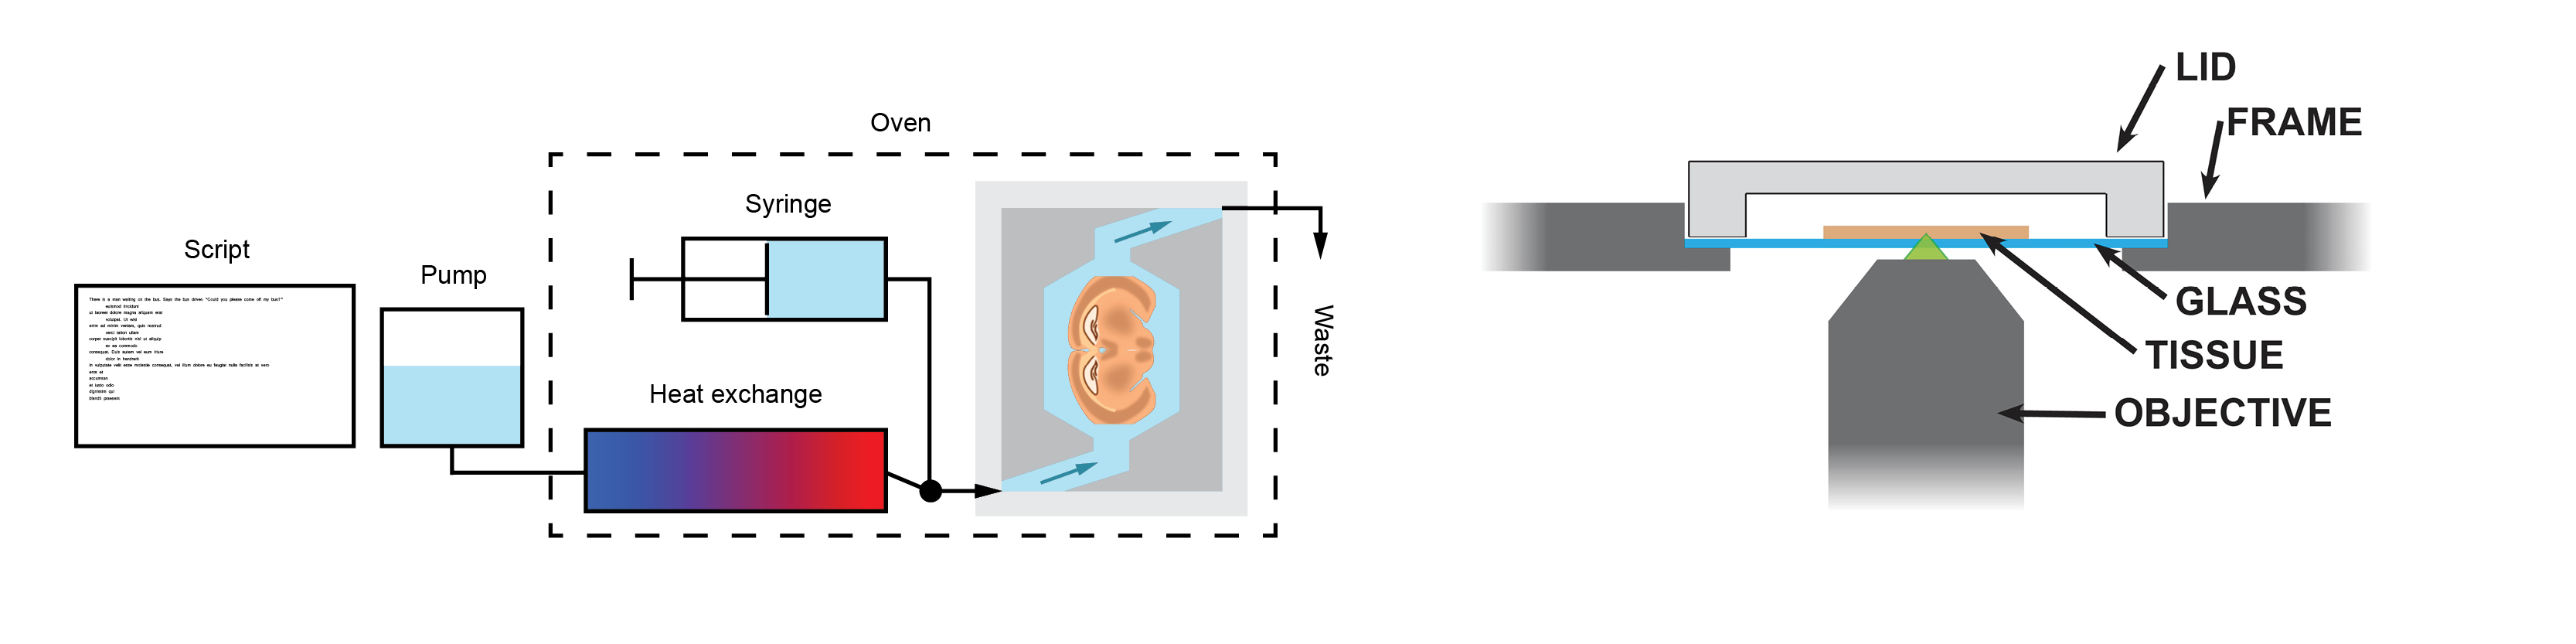
The fluidic system used for osmFISH is simple. It consists of a Dolomite Mitos P-Pump which is controlled by a custom python script. The pump is used to automate all the wash steps. For dispensing of smaller volumes, like the hybridization mix, simply remove the tube and pipet the liquid into the chamber.
In our setup the hybridization chamber is placed in an oven to control the temperature during the hybridization, washing and stripping. The incoming tube from the pump is lead through a bottle of water that is inside the oven so that the new buffer gets the right temperature. Furthermore, we use an Y-connector and some shutoff valves to have a separate input line where we can connect a syringe. This is useful to purge the hybridization chamber and expel air bubbles.
One important consideration is that even though there are 6 flow cells, it requires a slightly different setup to use all 6 simultaneously. This is because it is hard to evenly divide the flow over all 6 chambers. If you connect multiple chambers to the same source the flow will take the route of the least resistance. If there is a difference in flow resistance the chambers will get a different treatment. This can be caused by some salt precipitation or kink in one of the tubes. However, it should be easy to prevent this. Either by sequentially addressing the individual flow cells (using something like a multivalve), or by using multiple pumps. This can be multiple Dolomite pumps or a multi-channel syring pump.
Imaging
The signal of smFISH is very weak in contrast to regular FISH or immunohistochemistry. Therefore, it is required that images are taken on an epifluorescent microscope with a high-magnification high-numerical-aperture objective and with long exposure times (1second). We use a Nikon Ti-E with a Lumencor Sola or Spectra X light source, an Andor zyla 4.2 plus camera, and a Nikon CFI Plan Apo Lambda 100X oil objective with a NA of 1.45. It is possible to image the signal of osmFISH with a 60X objective
As a concequence of the high magnification/NA objective it is important to mount the samples on coverslips instead of regular microscope slides, because the working distance of these objective can be too short to image the sample through the thick microscope slide.
To perform the imaging of our osmFISH experiments we use a custom imaging job that is made in the Nikon Nis-Elements microscope control software. This job enables the selection of an region of interest using the 10X objective. It then generates points to cover that area with fields of view of the 100X or 60X objective. These points are then saved to be imaged every round.
A point-scanning confocal system will take too long to aquire an image of smFISH signal because of the low amount of fluorophores and long required exposure times. However, a faster alternative would be a spinning disk confocal system, but we did not test this. If you try, would you be so kind to share the results with us so that we can update this page.
Imaging the same ROI
For osmFISH it is very important that the same area is imaged every time, otherwise you do not get all measurements of the same cells. Using the described flow cell made this trivial. However, even without the same flow cell it must be possible. There are 2 options.
1 - Either you make your own flow cell or use a different flow cell that can be placed in the stage repeatedly without displacement. The easiest setup we can think of is a plate of polycarbonate in the shape of a microtiter plate so that it can be placed in the microscope stage. Drill two small holes through the plate, these will be the liquid inlet and outlet. Then, stick thick double sided tape in the shape of a flow cell on the bottom and place the glass with your tissue on to close the flow cell.
2 - It will be tedious but it should be possible to select the region of interest every round of the experiment. Use recognizable landmarks in the tissue to select the same region. The registration of the osmFISH analysis pipeline will align the images of the different rounds.
Maintaining focus
Surprisingly, one of the most challenging parts of the protocol is to make sure the the tissue stays in focus during the imaging. Imaging takes a long time, typically 10-14 hours, and minute temperature changes during that period can affect the focal plane due to thermal expansion or schrinkage. Our advise would be to always leave the microscope on so that the microscope reaches an thermal equilibirium and have a very stable room temperature. In adition, a microscope temperature control box for live cell imaging might be a good solution. We used a portable air conditioning system to blow cold air onto the sample and stage to keep the temperature even throughout the imaging period.
Additionally, an autofocusing function might be a good solution but is not as trivial as it seems. If you use a 60X or 100X objective, the focal plane will be very thin. In fact it will be thinner than the tissue. So if the autofocus function scans through its range to find the tissue, there are multiple planes that are “in focus” because they are all in the tissue. The autofocus function thus can return any Z-plane that is between the bottom and top of the tissue. You would need some smart function to build the Z-stack, or oversample enough so that the tissue is fully imaged.
Data Processing
Computing power
The size of the dataset, together with the turnaround time require will determine if to run the analysis locally or on a large computer cluster. The code is portable and can be run on a laptop or a workstation but a cluster or a HPC is needed in order to have a reasonable turnaround time. We processed the current dataset (~5Tb of raw data) in a cluster using 100 CPUs distributed in 10 nodes with 256 Gb of RAM each and it took ~4 days. Because the large size of the images of each field of view and of the output of the different steps of the analysis it is strongly recommended to run the processing on computers/clusters with large RAM.
Where to start
To test the algorithms used for filtering and counting is good to start from a small dataset and use the process standalone experiment script. No stitching or alignment will be run therefore any dataset can be processed.